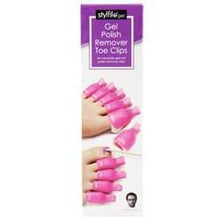
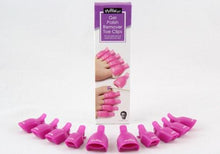
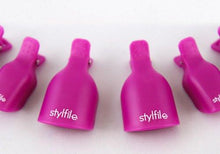
Stylfile Gel Nail Polish Remover Toe Clips
Regular price
$9.99
$4.99
Sale
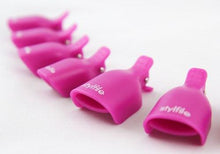
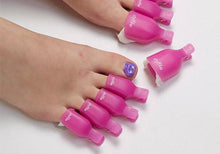
Love Gel toenail polish, but hate taking it off? Stylfile Gel Polish Remover Toe Clips are the latest essential for removing gel-polish at home. These reusable clips replace fiddly foils to hold acetone-soaked cotton wool perfectly in place. Expertly developed to fit each toenail, stop picking and start soaking off your gel-polish without wreaking havoc with the health of your natural nails.
How to use: Reusable clips are used in place of foils to firmly and comfortably hold the acetone-soaked cotton wool in place. Full instructions provided.
Find Out More
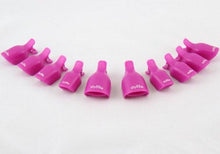
Saving time and money on professional treatments, the reusable Stylfile Gel Polish Remover Toe Clips make gel-polish removal quick and easy. This set of 10 clips can be used instead of foil to hold acetone-soaked cotton wool in place over the nails. Designed for use in conjunction with corresponding products in the Stylfile Gel Polish Remover range, remove gel-polish at home without reducing nail thickness*, a reoccurring issue cited by 52% of gel-polish users**
Each pack contains step-by-step instructions compiled by celebrity nail technician Jenny Longworth: “You can have healthy, amazing looking nails, post gel nail polish,” she says.
*Based on a study of 13 women in December 2015 using a DermaScan High Frequency Ultrasonic device. Of the 13 nails measured, not one was thinner after removing gel polish using the Stylfile Gel Polish Remover Kit.
**Based on a survey of 1,000 women
Contents: 10x Gel Polish Remover Toe Clips and user instructions.
Instructions
PLEASE NOTE BEFORE YOU START THAT ALL GEL POLISH MANUFACTURERS HAVE SLIGHTLY DIFFERENT REMOVAL PROCESSES. THESE CAN INCLUDE VARYING SOAK TIMES AND PREP TECHNIQUES. ALWAYS REFER TO YOUR GEL POLISH MANUFACTURER FIRST TO CHECK THEIR RECOMMENDATIONS.
Prepare
- Step 1. If buffing is recommended by your gel polish manufacturer, use the light grey side of the Zebra S-file (sold separately), to gently buff the surface of your gel polish colour. Use a slow, gentle filing motion from one side of the nail to the other. You do not want to file away any of the gel, simply remove the shine. This breaks the top layer, allowing the remover to work more effectively. Take special care not to file through to the natural nail and be careful around the edges so as not to damage the surrounding skin.
- Step 2. Take 5 cotton pads (not included) and cut them into 10 halves. Half a cotton pad provides the perfect size to fit neatly underneath the Stylfile remover clips with no overhang.
- Step 3. Take a half cotton pad and soak it with gel polish remover liquid (sold separately).
Remove
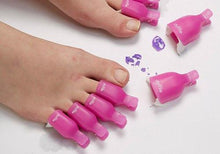
- Step 4. Place the soaked cotton pad on one toe, being sure it covers the whole surface of the nail. Clip a Stylfile Gel Polish Remover Toe Clip over the top and give it a gentle squeeze to ensure a snug fit between the cotton pad and the nail. The tighter the bond, the more effective the removal. Repeat this process on all 10 toes. The remover will now begin to penetrate and break down the adhesive bonds which adhere the gel polish coating to the natural nail. We recommend a minimum soak time of 15 minutes. However, remember all gel polishes have slightly different soak times so please be sure to double check with the manufacturer. Other factors can also affect soak times. These include poor prep and application techniques, thickness and the length of time that the gel polish has remained on the nail. Be aware that your gel may be more stubborn to remove, so please be patient.
- Step 5. After an initial 10-15 minutes, remove the Stylfile Clips and cotton pads. You should see the gel has begun to lift away from the natural nail plate. Take a manicure stick (sold separately) and using the lightest of pressure, gently tease away the lifted gel only. If this requires any more than absolute minimal pressure, the gel is not ready to be removed. NEVER FORCE OR SCRAPE THE GEL OFF AS THIS WILL DAMAGE YOUR NATURAL NAIL. If your gel hasn't started to lift after the initial 15 minutes, increase the soak time by a further 10 minutes or until the gel can be removed easily, without using any force whatsoever.
- Step 6. If any gel remains, reapply your cotton pad and Stylfile remover clip. You may want to reload the cotton pad with more remover if it feels a little dry. Wait a further 5-10 minutes and check again.
- Step 7. Dispose of used cotton pads and removed gel polish by placing in a metal closed-top bin.
Repair
- Step 8. Wash your feet to remove any dust and debris. Wait 60 minutes before taking the Stylfile S-buffer (sold separately) to gently buff the surface of your natural nail. Starting with side 1, work your way through to side 4 to bring the nails up to a high shine. It is important to wait 60 minutes before you buff, as after soaking, the nail becomes softer and more prone to damage.
- Step 9. Finish with a dose of Stylfile Cuticle Oil (sold separately). Sweep around the cuticle area and massage it in to nourish and condition the nail plate and surrounding skin.
Notes: If your gel hasn't lifted or completely removed after 30 minutes, please seek advice from a nail professional. Never file to completely remove gel coatings from natural nails. Never pick, pry, force or peel gel coatings from the natural nail.
Warnings: Gel polish contains acrylates, which if not properly cured can be harmful to the skin and cause allergic reactions over time. Please therefore use every care not to touch the removed gel polish and dispose of it quickly and carefully in a closed-top metal bin. This is not a toy. Keep out of reach of children at all times.
Caution: This process requires Acetone which is highly flammable and may cause drowsiness or dizziness. Please follow instructions on bottle. Keep away from heat, sparks, open flames, hot surfaces and direct sunlight. No smoking. Store and use in a well-ventilated place. Keep acetone away from all clothing and surfaces, especially plastic. Wash hands and feet after use. Place a towel down to protect surfaces before you carry out the removal process.


